Presentation Player Client Setup Instructions and getting started
Instructions last updated: 22 June 2018
Your player computer needs to be a Windows based computer. The
Presentation Player Client software installs to the Windows Tray in the bottom
right of the screen which looks like a little orange PP like:

For example, on
Windows 10 it looks like this:

This program runs in the background and continually communicates with
PresentationPlayer.com to receive instructions from your Presentation Player
online account. The most common instruction will obviously be to play a
particular Microsoft PowerPoint presentation you have uploaded to your account.
It also allows you to see a screen shot of the playing computer and also perform
a remote restart in the event of a problem (you need to disable the Windows
login first). It also allows you to select a PowerPoint presentation
to start automatically when Windows starts as well.
If order to play Microsoft PowerPoint files you will
need to install the free
Microsoft PowerPoint Viewer software. No
other software is required.
NOTE - The first time a PowerPoint presentation is played with the
PowerPoint Viewer, it will bring up a licence agreement for that you have to
agree to, so you need to play a single PowerPoint file after setup so that the
Presentation Player Client can run without any user intervention.
You can optionally set up the computer to automatically log into Windows when it
is turned on. This is ideal for player computers in remote locations that
are dedicated to playing your PowerPoint presentations.
Client setup instructions
1. Login to your
PresentationPlayer.com account (or sign up for a free account if you haven't
done so already and then Login).
2. Click on the 'Player computers' icon to take you to the Players list
page of your online account.
3. You need to find your Read-only account details:

and make a note of them.
4. On your player computer, download and run the Free Microsoft PowerPoint
Viewer setup program. This can be downloaded from:
http://www.presentationplayer.com/downloads/PowerPointViewer.exe
5. On your player computer, you then need to download and install
PowerPoint Viewer Service Pack 2 (SP2) from:
http://www.presentationplayer.com/downloads/PowerPointViewerSP2.exe
6. You will also need need to the Microsoft Office Compatibilty Pack which
allows the PowerPoint viewer to support Powerpoint 2013 and 2016 file formats:
http://www.presentationplayer.com/downloads/FileFormatConverters.exe
IMPORTANT - The first time the
Microsoft PowerPoint Viewer software, runs, it comes up
with a licence agreement screen. So you will need to confirm this once and
then the Presentation Player Client software
7. On your player computer, download and run the
Presentation Player Client software setup program. This
can be downloaded from:
http://www.presentationplayer.com/updates/PPClientSetup.exe
Note - The Presentation Player Client uses the
Microsoft .NET Framework 4.0 which is built into Windows
8 and 10. You may be prompted to install this on ealier versions of Windows.
8. During the installation you will be prompted to enter your Presentation
Player email address and password. Don't use your normal one, but use the
Read-only player acocunt details listed below and click on the Connect button.
Then use the Connect button to connect your Player to PresentationPlayer.com.

9. Log back onto your PresentationPlayer.com account, click on 'Player
computers' and you should see your player computer listed and ready.
Getting started with Presentation Player - Upload some PowerPoint files
OK, so you have a player online. Next you need to log onto your
PresentationPlayer.com account and use the File Manager option to upload some
PowerPoint files to your account.
In order to use PowerPoint files with the free Microsoft PowerPoint Viewer,
PowerPoint files need to automatically transition between slides and loop at the
end. The idea of a player computer is that no one is sat there clicking
the mouse to move to the next PowerPoint slide, so your PowerPoint file needs to
automatically move between the slides itself. The PowerPoint file also
needs to automatically loop at the end, otherwise it will just stop after
displaying the presentation once. You can either set up your PowerPoint
presentations to do this before uploading to PresentationPlayer.com or you
can use the File Manager's 'Automatic PowerPoint file processing options':
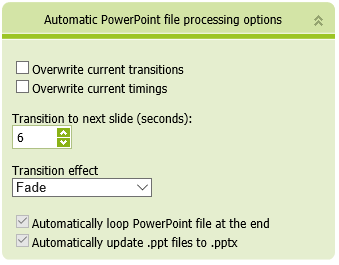
which will set PowerPoint files (which have not been set to automatically
transition and loop) to the ones that will, so that they are ready to send to
the Player computers.
So upload a couple of test PowerPoint files and then continue on to the next
section. If you haven't got any PowerPoint files to hand, then we
put a sample PowerPoint file called PresentationPlayer.pptx in your files folder
when your account is set up, just for testing.
Sending PowerPoint files to your Players
Log into your online account and click the 'Player computers' option which will
show you all the players you have linked to your account. Use the SEND
POWERPOINT option by clicking on the 'Send' button to start sending a PowerPoint
presentaiton to your player computers:

By default, this will send to all of your computers. You can use the check
boxes next to players in the list to just send to individual computers.
You can also filter you players by using these boxes:
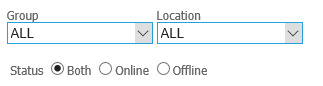
You can set groups and locations by clicking on the View button next to
individual player records in your list and typing a location or group fofr each
player. For example, group could be 'Accounts Department' and location
could be 'Building 1'. Anything you like. This then
allows you to filter by group or location so that that you can send PowerPoint
presentations to multiple screens at the same time.
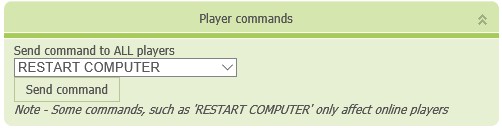
Sending commands to Players
This is similar to the Send PowerPoint files option in that you can either tick
a particular player to send a command to, or use the filter option (player
group, player location or on/off line) to send to several players at the same
time. Most commands are self explanitory, such as RESTART COMPUTER,
SHUTDOWN COMPUTER, etc.